Macro-Codes


1. Split an 8-bit RGB-image in separate channels (R, G and B), save as greyscale 

You may change the image type (here, bmp) according to your needs; just select the folder containing the images to process; the single RGB-channels are saved as greyscale.

dir=getDirectory("Choose a Directory");
print(dir);
splitDir=dir + "\Split\\";
print(splitDir);
File.makeDirectory(splitDir);
list = getFileList(dir);
for (i=0; i<list.length; i++) {
     if (endsWith(list[i], ".bmp")){
               print(i + ": " + dir+list[i]);
             open(dir+list[i]);
             imgName=getTitle();
         baseNameEnd=indexOf(imgName, ".bmp");
         baseName=substring(imgName, 0, baseNameEnd);
         run("Split Channels");
         selectWindow(imgName + " (blue)");
         rename(baseName + "-blue.bmp");
         saveAs(splitDir+baseName + "-blue.bmp");
         close();
         selectWindow(imgName + " (green)");
         saveAs(splitDir+baseName + "-green.bmp");
         close();
         selectWindow(imgName + " (red)");
         saveAs(splitDir+baseName + "-red.bmp");
         run("Close All");
     }
}


2. Split 8-bit RGB-image in tiles and save the tiles as sequence  

"tilesrowcolumn=4" will produce 4x4=16 tiles from the original image; just select the folder containing the images to process;  "filetype" specifies the images to process
tilesrowcolumn=4; 
filetype=".bmp";
dir=getDirectory("Choose a Directory");
splitDir=dir + "\Tiles\\";
File.makeDirectory(splitDir);
list = getFileList(dir);
for (i=0; i<list.length; i++) {
     if (endsWith(list[i], filetype)){
               print(i + ": " + dir+list[i]);
             open(dir+list[i]);
             imgName=getTitle();
run("Montage to Stack...", "images_per_row=tilesrowcolumn images_per_column=tilesrowcolumn border=0");
for (j=1; j<= tilesrowcolumn*tilesrowcolumn; j++)
{
         setSlice(j);
         name = indexOf(list[i], ".");
         title = substring(list[i], 0, name);
         saveAs(splitDir+title+"-0"+j+ filetype);
}
         run("Close All");
     }
}

3. Add stepwise noise to an image and save every single step

[addnoise=how often noise is added;  noisestandarddev=standard deviation of the noise added; imagesavestep=save (only) every n-th image; filetype specifies the images to process; just select the folder containing the images to process]
addnoise=10; 
noisestandarddev=25;
imagesavestep=1;
filetype=".bmp";
dir=getDirectory("Choose a Directory");
noiseDir=dir + "\Noised\\";
File.makeDirectory(noiseDir);
list = getFileList(dir);
for (i=0; i<list.length; i++) {
     if (endsWith(list[i], filetype)){
               print(i + ": " + dir+list[i]);
             open(dir+list[i]);
             imgName=getTitle();
saveAs(noiseDir+imgName+"-original"+ filetype);
for (j=1; j<= addnoise; j++)
{
         run("Add Specified Noise...", "standard=noisestandarddev");
       
if (j%imagesavestep==0) {
name = indexOf(list[i], ".");
         title = substring(list[i], 0, name);
         saveAs(noiseDir+title+"-noised0"+j+ filetype);
}
}
         run("Close All");
     }
}

4. "Cyt/Nuc"-macro and additional material

You may change the image type (here, bmp) according to your needs; just select the folder containing the images to process; the single RGB-channels are saved as greyscale.
Mobirise

The "Cyt/Nuc"-macro.
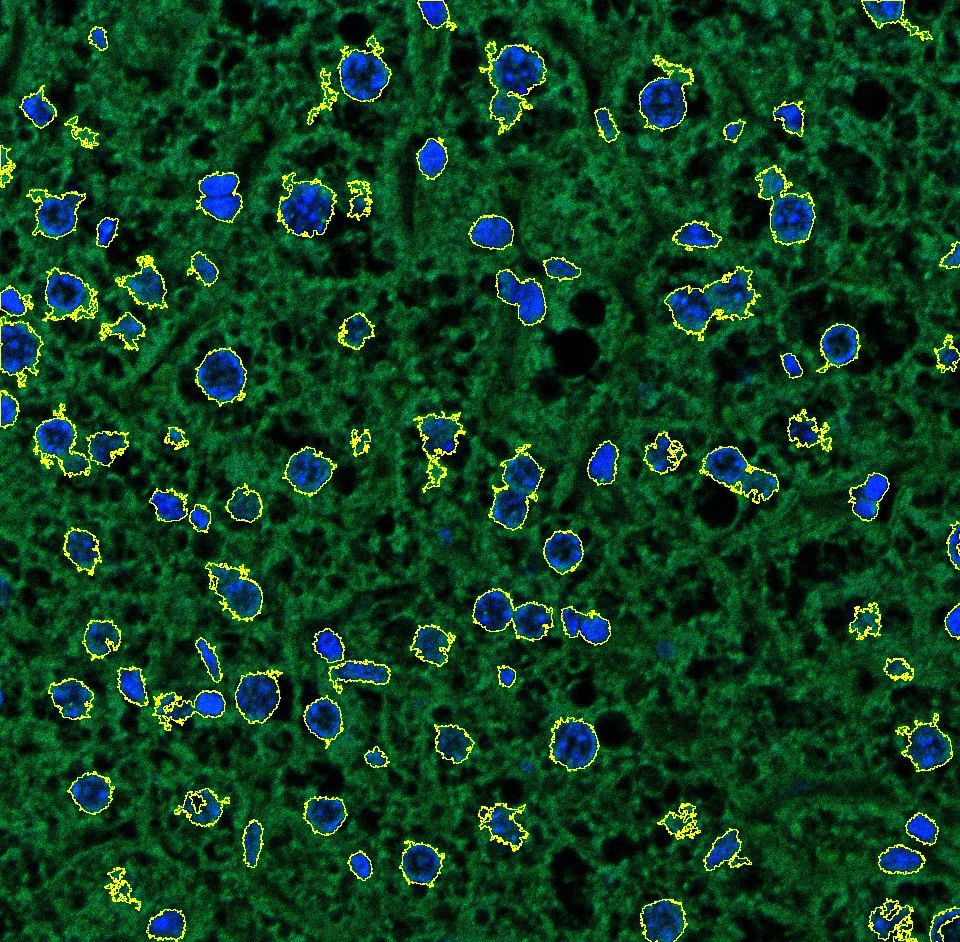
Here, you can download a package showing the function of the "Cyt/Nuc"-macro, that is able to quickly compare the amounts of a protein of interest in both cytosol and nucleus of immunostained cells or tissue samples.
Furthermore, the whole process of evaluation is documented in detail (recognized structures, results, used settings, date).

Download!  

This package contains: 
- Original images with two or three fluorescence-channels (blue for DAPI, green for     immunoproteasome, red for a subunit of the 26S proteasomal regulator)
- The images produced by the macro (showing recognized nuclei and cytosol)
- Files containing the results (*.txt) and the settings used (*.txt) during evaluation.

Feel free to use/modify "Cyt/Nuc", but please cite our publication:
"Cyt/Nuc", a customizable and documenting ImageJ macro for evaluation of protein distributions between cytosol and nucleus.

5. Split a Zeiss-LSM image into its RGB-channels, save as colored images

Just select the folder containing the original images to process; the single RGB-channels are saved as separate images in the according color with the correct name-extension.
dir=getDirectory("Choose a Directory");
print(dir);
splitDir=dir + "\Split\\";
print(splitDir);
File.makeDirectory(splitDir);
list = getFileList(dir);
for (i=0; i<list.length; i++) {
     if (endsWith(list[i], ".lsm")){
               print(i + ": " + dir+list[i]);
             open(dir+list[i]);
             imgName=getTitle();
         baseNameEnd=indexOf(imgName, ".lsm");
         baseName=substring(imgName, 0, baseNameEnd);
       
 run("Split Channels");
         selectWindow("C3-"+imgName);
         saveAs(splitDir+baseName + "-blue.bmp");
         close();
         selectWindow("C2-"+imgName);
         saveAs(splitDir+baseName + "-green.bmp");
         close();
         selectWindow("C1-"+imgName);
         saveAs(splitDir+baseName + "-red.bmp");
         run("Close All");
     }
}

6. Convert a 3-channel Zeiss-LSM image into RGB-bitmap

Saves time to convert every single image manually using ZEN.
dir=getDirectory("Choose a Directory");
print(dir);
list = getFileList(dir);
for (i=0; i<list.length; i++) {
     if (endsWith(list[i], ".lsm")){
               print(i + ": " + dir+list[i]);
             open(dir+list[i]);
             imgName=getTitle();
         
run("Make Composite");
run("Stack to RGB");
name = indexOf(list[i], ".");
         title = substring(list[i], 0, name);
         saveAs(dir+title+"-RGB.bmp");
         run("Close All");
     }

7. Split an RGB-image in its separate channels and determine the lower autothreshold for every single channel  

"filetype" specifies the images to process;  you get a table (lower thresholds.txt) showing the lower thresholds for every single channel (red, green, blue) suggested by ImageJ; the upper threshold is always 255 for 8-bit or 4095 for 12-bit images.
filetype=".bmp";
dir=getDirectory("Choose a Directory");
list = getFileList(dir);
print("Image name", "\t", "\t", "Red channel", "\t", "Green channel", "\t", "Blue channel");
for (i=0; i<list.length; i++) {
     if (endsWith(list[i], filetype)){
               print(i + ": " + dir+list[i]);
             open(dir+list[i]);
             imgName=getTitle();
run("Split Channels");
selectWindow(imgName + " (blue)");
     
setAutoThreshold("Mean dark");
getThreshold(lowerblue,upperblue);
close();
selectWindow(imgName + " (green)");
setAutoThreshold("Mean dark");
getThreshold(lowergreen,uppergreen);
close();
selectWindow(imgName + " (red)");
setAutoThreshold("Mean dark");
getThreshold(lowerred,upperred);
print(imgName, "\t", "RGB", "\t", lowerred, "\t", lowergreen, "\t", lowerblue);
run("Close All");
     }
}
selectWindow("Log");
saveAs("text", dir+"lower thresholds.txt"); 
8. Convert a video (AVI) into greyscale and save the single nummerated frames

For some reason it is NOT possible to name the directory that stores the single frames "frames"; if your video has more than 100,000 frames, add another if{save}-line.
filetype=".avi"; 
dir=getDirectory("Choose a Directory");
 
splitDir=dir + "\sframes\\";
File.makeDirectory(splitDir);
list = getFileList(dir);
for (i=0; i<list.length; i++) {
     if (endsWith(list[i], filetype)){
               print(i + ": " + dir+list[i]);
             open(dir+list[i]);
             imgName=getTitle();
run("8-bit");
slicenumber=nSlices+1;
for (j=1; j<slicenumber; j++) {
setSlice(j);
name = indexOf(list[i], filetype);
         title = substring(list[i], 0, name);
         
if (0<j && j<10){
saveAs(splitDir+title+"-frame0000"+j+".bmp");
}
if (9<j && j<100){
saveAs(splitDir+title+"-frame000"+j+".bmp");
}
if (99<j && j<1000){
saveAs(splitDir+title+"-frame00"+j+".bmp");
}
if (999<j && j<10000){
saveAs(splitDir+title+"-frame0"+j+".bmp");
}
if (9999<j && j<100000){
saveAs(splitDir+title+"-frame"+j+".bmp");
}
}
run("Close All");
     }
}

9. RGB-Counter (v. 1.0)

This macro counts particles in all three channels of an RGB-image. The results are stored as data table and you get images for every single channel clearly showing the individual recognized particles - in order to check your settings, as well as to control and document the whole process of evaluation. Please download the "RGB-Counter"-package, it includes a very detailed manual, two different versions of the macro, and a few sample images to test it.

The "RGB-Counter" (v. 1.0)

Here, you can download a package containing the macro, a manual and example images.

Download!


10. "Ranker" (v. 1.0) - Arrange samples with a variety of measured parameters

Sorting data is difficult when there are a variety of different parameters from each sample. "Ranker" places these samples in a ranking like athletes competing in different disciplines. This is useful if you want to identify the highest and lowest ranked samples.

"Ranker" (v. 1.0)

Here, you can download a package containing the macro, a manual and example data.

Download!


11. "Primes" v.1.0 - A short and quick prime number-generator for ImageJ

A fast and well-described prime number generator for ImageJ

"Primes" (v. 1.0)

Here, you can download a package containing the macro and additional information.

Download!


12. "MYOCYTER" (v1.3) - Extract just everything from your myocytes

MYOCYTER is a peer-reviewed ImageJ-macro (ScientificReports), that extracts more than 40 different parameters from high-speed videos of contracting cells/structures providing a incredible workflow. Please always use the latest version. Get the macro, sample videos and very detailed manuals here.

The update (v1.2) comes with many improvements: Better recognition, more functions, enhanced workflow!


Download the macro (v1.2) with manual and quickstart (14 MB).

NEW! Download the macro (v1.3) with manual and quickstart (16 MB). NEW!

Download sample videos for testing (19 MB)

Download the peer-reviewed publication (5 MB) 


13. "PrimeLister" (v1.1) - An extreme fast prime number generator for ImageJ and C++

PrimeLister (v1.1) generates about 250,000 primes/second in ImageJ and up to overwhelming 20 million primes/sec in C++.

Download the PrimeLister-codes for both ImageJ and C++, as well as the compiled EXEs right here: PrimeLister v1.1 Download

Here, you can find a video about the idea and the algorithm of PrimeLister:

PrimeLister v1.1 explained...